Sooo, I have my computer science exam on Monday, but I do not really know where to begin studying. Instead, I am joining the quest of baking bloggers around America to recreate the Levain Bakery cookies. The ironic thing is that I could get on a subway, go uptown, and buy a Levain cookie , rather than looking at pictures online. I would not even have to change trains, BUT I’m just not that motivated.
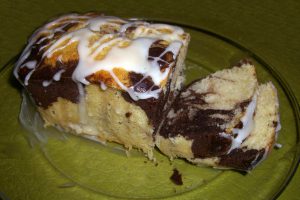
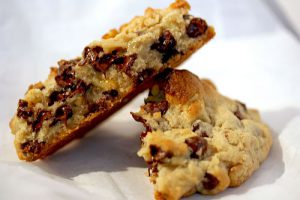
Here is an original Levain cookie:
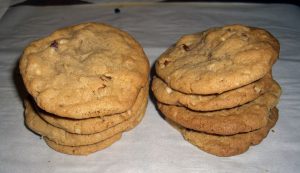
Anyway, the purpose of this cookie is size. SIZE MATTERS. These cookies are supposed to be seriously ginormous and chock-full of nuts and chocolate. In fact, they sort of look more like scones than your typical chocolate chip cookie. So, I attempted several approaches (6, actually) based on 3 recipes and I 1/4-sized the batches, since these were really testers. Without further ado, here are my mini-batches:
a)
b)
Recipe #1
2 oz (1/4 c) unsalted European butter, slightly softened
4 1/2 tbs granulated sugar
1 1/4 tbs brown sugar
1/2 egg (just beat it and use half)
1 1/4 tbs molasses
1 c plus 1 tbs sifted flour
1/4 tsp Kosher salt
1/4 tsp baking soda
1/2 c chocolate chips
1/4 c walnut halves (you want them big)
1. Preheat oven to appropriate temperature (see Step 4). [I toasted the walnuts for 7 minutes here because I prefer toasted nuts but it is not necessary.] Line a baking sheet with parchment paper.
2. In a small bowl, whisk together the flour, salt and baking soda. In a medium bowl, beat the butter with the granulated sugar and brown sugar. Add in the egg and molasses and beat until well mixed. Slowly add in the flour mixture.
3. Stir in the chocolate chips and walnut halves.
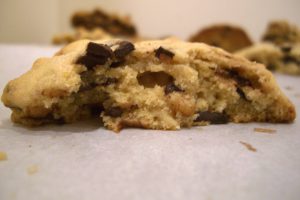
4. Form into 4 large balls. Place on baking sheet and:
a) bake for 18 minutes at 350oF
b) set oven to 375oF and bake for 8 minutes, then lower to 325oF and bake 12 minutes more.
5. Cool on baking sheet 1 minute and transfer to wire racks to cool completely.
Review: These tasted very molasses-y (not a real word, but you get the idea). They were really moist, but…they tasted very molasses-y. That is not a bad thing if you like molasses, but when you are striving for a huge classic chocolate chip cookie, it kind of is.
a)
b)
Recipe #2
1/4 c unsalted European-style butter, slightly softened
3 tbs granulated sugar
3 tbs brown sugar
1/2 egg
pinch of vanilla extract
3/4 c plus 1 tbs all-purpose flour
pinch Kosher salt
1/4 tsp baking powder
pinch of baking soda
1/2 c chocolate chunks
1/4 c walnut halves
It’s a very similar procedure to above:
1. Preheat oven to appropriate temperature (see Step 4). [I toasted the walnuts for 7 minutes here because I prefer toasted nuts but it is not necessary.] Line a baking sheet with parchment paper.
2. In a small bowl, whisk together the flour, salt, baking powder and baking soda. In a medium bowl, beat the butter with the granulated sugar and brown sugar. Add in the egg and vanilla extract and beat until well mixed. Slowly add in the flour mixture.
3. Stir in the chocolate chips and walnut halves.
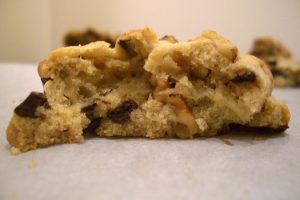
4. Form into 4 large balls. Place on baking sheet and:
a) bake for 18 minutes at 350oF
b) set oven to 375oF and bake for 8 minutes, then lower to 325oF and bake 12 minutes more.
5. Cool on baking sheets 1 minute and transfer to wire racks to cool completely.
Review: These were really awesome. Before baking them as indicated in part b), I refrigerated the dough for about 10 minutes, and they held their shape. The difference between a) and b) is that a) produces a cookie that is crispy on the outside and chewy on the inside, whereas b) yields a cookie that is mostly chewy throughout. Although I am usually partial to a chewy cookie, I really enjoyed a).
a)
b)
Recipe #3
(This is actually a half recipe. It is basically a variation on Reicpe #2 with the addition of cake flour.)
1/4 c unsalted European-style butter
1/4 c plus 2 tbs granulated sugar
1/4 c plus 2 tbs brown sugar
1 egg
1/4 tsp vanilla extract
3/4 c plus 1 tbs all-purpose flour
3/4 c plus 1 tbs cake flour
1/8 tsp Kosher salt
1/2 tsp baking powder
1/8 tsp baking soda
1 c chocolate chunks
1/2 c walnut halves
1. Preheat oven to appropriate temperature (see Step 4). [I toasted the walnuts for 7 minutes here because I prefer toasted nuts but it is not necessary.] Line a baking sheet with parchment paper.
2. In a small bowl, whisk together the flour, salt, baking powder and baking soda. In a medium bowl, beat the butter with the granulated sugar and brown sugar. Add in the egg and vanilla extract and beat until well mixed. Slowly add in the flour mixture.
3. Stir in the chocolate chips and walnut halves.
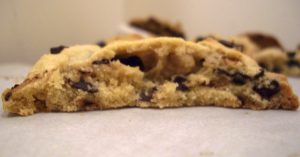
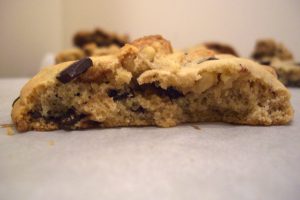
4. Form into 4 large bowls. Place on baking sheet and:
a) bake for 18 minutes
b) set oven to 375oF and bake for 8 minutes, then lower to 325oF and bake 12 minutes more
5. Cool on baking sheets 1 minute and transfer to wire racks to cool completely.
Review: These spread a bit more than the other ones, even after some refrigeration. The ones baked at 325o first spread less than the ones baked only at 350o. Taste-wise, I believe that the ones baked according to b) come the closest to the Levain cookies (cake-like texture, that is) – hardly a surprise, considering that half of the flour was cake flour. I think that if I added more chocolate, they would be Levain doppelgangers.
So, after all of that, what was my conclusion? Either Recipe 2b or Recipe 3b. (To be honest, Recipe 1 made me slightly nauseous.)