Jackie and Jillian’s Apple Pie

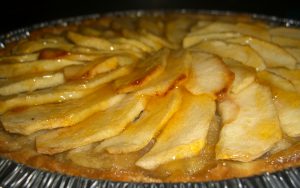
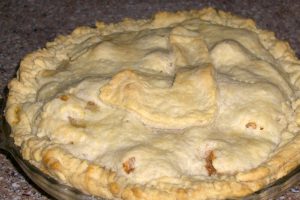
Over the weekend, my friend, Jackie, and I decided to go on a weekend adventure upstate to pick some apples and get fresh air.? We realised that we do not really do all that much on weekends, so we made it our goal to have some adventures, like going to the NYC Medieval Festival a few weeks back.? Anyway, after some apple baseball and corn maze, we ended up with 42 lbs of apples and 3 pumpkins, which is a rather ridiculous amount of produce, but hey, you only go apple picking once a year! When we returned home, we decided that it might be fun to bake an apple pie.? Jackie had the brilliant idea of putting a J on the top for our names!

apple pie

Jackie and Jillian’s Apple Pie
For the crust
10 tbs cold unsalted butter
6 tbs cold vegetable shortening
2 2/3 c all-purpose flour
2 tbs sugar
1/2 tsp salt
8 tbs ice water

Filling
6-7 apples, peeled, cored and cut into chunks
4 tbs butter, melted
2 tbs flour
1/2 c brown sugar
1/2 c white sugar
1 tbs lemon juice
1 tsp cinnamon

1. Cut the butter and shortening into 3/4″ pieces. In a large bowl, combine the flour, sugar and salt. Scatter the butter and shortening pieces over the mixutre and toss with a fork to combine. Using a pastry blender, cut the butter and shortening in until the mixture forms large, coarse crumbs the size of large peas. Drizzle the ice water over the mixture and toss with the fork until the dough is evenly moist and comes together in a mass (but not a ball). Transfer the dough to a work surface. Shape into 2 6″ disks, wrap in plastic wrap, and refrigerate until well-chilled, at least 1 hour.
2. Preheat the oven to 375oF. Roll out each of the disks to about 1/8″ thick. Line a greased pie plate with one dough round and refrigerate.
3. In a large bowl, mix the apples, butter, flour, sugars, cinnamon and lemon juice. Pour into the pie plate. Cover with the remaining dough round and pinch the edges of the dough rounds together to seal. Prick the top layer of dough all over with a fork.
4. Place the pie in the oven and bake for 45-50 minutes, until the top is golden and filling is bubbly. Remove from the oven and transfer to a rack to cool.

Makes 1 pie

Bakewell Tart

In honour of my sister’s Columbus Day visit, I decided to make a full-size version of the Bakewell tartlets. This time, instead of a marzipan topping, I used a powdered-sugar based glaze. The recipe was basically a modification of the recipe for the tartlets.

bakewell tart

Bakewell Tart
Shortcrust Pastry
2 c (12 oz) all-purpose flour
3 oz butter
3 oz shortening
6-9 tbs ice water

Filling
Rasberry jam
2 sticks (1 c) unsalted butter, softened
1/2 c sugar
4 eggs
1 tsp almond extract
1/2 c flour
1/4 c finely ground almonds
2 tsp baking powder

Glaze Topping
2 c powdered sugar
Water

1. To make the shortcrust, sift the flour into a bowl. Using a pastry cutter, cut the butter and shortening into the flour until it forms coarse crumbs. Pour the ice water over the mixture, tablespoon by tablespoon, until it begins to come together. Shape into a disk and refrigerate for at least 30 mins.
2. Preheat the oven to 350o. Remove the dough from the refrigerator and roll out to 1/8″ thick. Line a greased 10″ tart pan with the dough round.
3. Prick the bottom of the shell all over with a fork (to prevent puffing), place in freezer for 5 mins, then prebake for 8 minutes. Remove from the oven and let cool to room temperature.
4. Meanwhile, make the filling. Beat the butter with the sugar until creamy, then add the eggs and almond extract. In a separate bowl, whisk the flour together with the baking soda and ground almonds. Beat this into the butter mixture until fluffy.
5. Spread a thin layer of raspberry jam in the bottom of the shell, then spoon the filling mixture on top. Bake for 20 to 25 minutes, until the top is are lightly browned. Remove from the oven and let cool completely on a wire rack.
6. Finally, make the glaze. In a large bowl, mix together the powdered sugar with some water. Continue to add water until the glaze is thick but pourable. Pour over the top of the cooled tart and smooth with an offset spatula.

Makes one 10″ tart

Vegetable Lasagne

I have decided to change the name of this site to Jillian’s Baking instead of Jillian’s Cookies, since I have somewhat expanded my recipes to include things that are baked but not cookies.

From my dinner-with-parents last week, I had a bunch of leftover spinach. So, I decided to make lasagne. I am not really a big meat eater, especially of ground meat, and I thought that making a tasty vegetable lasagne would be better than meat, especially since I could then take advantage of the lovely fall harvest, which is in full swing right now. I made 1/3 of mine with a limited amount of cheese for the lactose intolerant among us. Also, I kind of made this up as I went along but it definitely turned out alright.

lasagna

Vegetable Lasagne
1 box oven-ready lasagne pasta
3-4 c chunky tomato sauce (I make my own – see below for that)
1 15 oz container ricotta cheese
4 c mozzarella, shredded
1/2 c grated Pecorino Romano cheese
1 egg
1 medium zucchini, chopped
6 c fresh spinach leaves
2 c mushrooms, chopped
2 cloves garlic, minced
Olive oil
Salt
Black pepper

1. Bring a pot of water to a boil and immerse the spinach leaves for 2-3 minutes Drain well and pat dry.

2. Heat 3 tbs olive oil in a saute pan. Place the garlic in the pan and saute for 2 mins. Add the vegetables, season with salt and pepper to taste, and saute for 6-8 mins, until everything is slighly softened and well-seasoned.

3. Preheat oven to 350oF. Stir egg with ricotta, Parmesan cheese, 2 c of the shredded mozzarella, and 1/4 c of the tomato sauce in a medium bowl.

4. In a 9″x13″x2″ pan, spread 1 c sauce to cover the bottom. Layer 4 lasagne sheets, slightly overlapping. Spread half of the ricotta mixture, then spoon half of the vegetables over that and sprinkle 1 c of the mozzarella. Spread 1 1/2 c tomato sauce. Repeat layering lasagne sheets, remaining ricotta mixture, remaining vegetables, some mozzarella and 1 1/2 c sauce. The final layer will have 4 lasagne sheets, the remaining sauce and the remaining mozzarella.

5. Bake approximately 40-50 minutes, until bubbly and cheese on top is browned. Let stand 10-15 minutes before cutting.

Bakewell Tartlets

To me, Bakewell tarts are a quintessential part of England, but apparently (and sadly), they are quite rare in the US. My sister and I absolutely loved these growing up, and since we do not get to go to England as often as we used to, I decided to recreate this treasured delight for us.

Now, when I think of a Bakewell, I think of the sort which is sold in Tesco or other groceries or sandwich shops – that is the Mr Kipling’s variety. For those of you who don’t know, Mr Kipling:Britain as Entenmann’s:America. As I set out upon my quest for a recipe, I found that people seem to treat the Mr Kipling’s Bakewell with a significant measure of derision! Apparently, they are more interested in recreating the original Bakewell pudding (the forefather of the Bakewell tart) or a Bakewell tart from some historically correct 19th century recipe, a la Eliza Acton or Mrs Beeton. Not I! I wanted the Bakewell that I grew up with!

So I made up my own recipe: shortcrust, filled with a layer of raspberry jam, topped with almond sponge, topped with marzipan and a cherry. I believe Mr Kipling uses some sort of rolled fondant (aka sugarpaste) – I made the mistake of trying to use European fondant, which is apparently used for making the sculptures that people decorate cakes with. And I made this very sticky and messy mistake at 2AM, so when I finished clearing it up, I decided to just slap together some marzipan and put it on top, figuring that it would complement the almond sponge well (and then I made citrus fruits with the leftover marzipan).

bakewell tartlets

Bakewell Tartlets
Shortcrust Pastry
2 c (12 oz) all-purpose flour
3 oz butter
3 oz shortening
6-9 tbs ice water

Filling
Rasberry jam
8 tbs unsalted butter, softened
1/4 c sugar
2 eggs
1/2 tsp almond extract
1/4 c flour
2 tbs finely ground almonds
1 tsp baking powder

Marzipan Topping
1/2 lb finely ground almonds
1/2 lb (2 c) confectioners’ sugar
1/2 lb granulated sugar
1 egg, lightly beaten
1/2 tsp almond extract
1/2 tsp vanilla extract

Some candied cherries, coarsely chopped

1. To make the shortcrust, sift the flour into a bowl. Using a pastry cutter, cut the butter and shortening into the flour until it forms coarse crumbs. Pour the ice water over the mixture, tablespoon by tablespoon, until it begins to come together. Shape into a disk and refrigerate for at least 30 mins.
2. Preheat the oven to 350o. Remove the dough from the refrigerator and roll out to between 1/16″ and 1/8″ thick. (Because I make really tiny tartlets, I try to roll my dough as thinly as possible to leave plenty of room for the filling, which is obviously the best part). Cut into rounds and line a tartlet pan with them.
4. Prick the bottom of each tartlet shell with a fork (to prevent puffing), place in freezer for 5 mins, then prebake for 8 minutes. Remove the shells from the oven and let cool to room temperature.
5. Meanwhile, make the filling. Beat the butter with the sugar until creamy, then add the eggs and almond extract. In a separate bowl, whisk the flour together with the baking soda and ground almonds. Beat this into the butter mixture until fluffy.
6. Spread a thin layer of raspberry jam in the bottom of each tartlet shell, then spoon some of the filling mixture on top. The fillin will puff a bit, so do not fill the shells quite to the top. Bake for 18 to 20 minutes, until the tops are lightly browned. Remove from the oven and let cool completely in the tartlet pan on a wire rack.
7. Finally, make the marzipan topping. In a large bowl, whisk together the ground almonds and sugar. Stir in the eggs, almond extract and vanilla, then spread on top of each tartlet, and top with a cherry piece.

Makes about 32 tartlets (in my super-small pans)

Raspberry and Fig Galette

Here is the dessert that I made for dinner with the parents. As you may be able to surmise, it was a relatively Provencal-themed dinner. Fall is such a great time to make produce-centric things, because of all of the harvests. I went to the Union Square Greenmarket for a lot of stuff, since I think it is probably the best-stocked farmers’ market around. Every time I go there, it is a culinary adventure for me. The vendors have such a diverse assortment of products, and I just love how fresh everything is! I’m not exactly a proponent of buying “local” or buying “organic” but I am a proponent of buying FRESH, and you cannot beat a farmers’ market for that. To be honest, my local grocery store is pretty much rubbish, anyhow, especially for buying produce – sure it’s cheap but when you get home and realise for the umpteenth time that you’ve ended up with something mouldy and you have to throw it out, it becomes less worth it.

Anyway, galette! A galette is traditionally either a round, flat, crusty cake or a sort of open-faced buckwheat crepe. This galette is basically a hybrid of the two – replaces the crepe part with a lovely, crusty pie crust.

rasberry fig galette

Raspberry and Fig Galette
For the pastry
5 tbs cold unsalted butter
3 tbs cold vegetable shortening
1 1/3 c all-purpose flour
1 tbs sugar
1/4 tsp salt
4 tbs ice water

For the filling
12 figs (any variety), stemmed and quartered vertically
1/4 c light brown sugar, packed
2 tbs all-purpose flour
1 tbs fresh lemon juice (strained)
1/2 tsp almond extract
1/2 tsp vanilla extract
3 tbs granulated sugar
1 egg beaten with 1 tbs heavy cream
1 1/2 c raspberries

1. Cut the butter and shortening into 3/4″ pieces. In a large bowl, combine the flour, sugar and salt. Scatter the butter and shortening pieces over the mixutre and toss with a fork to combine. Using a pastry blender, cut the butter and shortening in until the mixture forms large, coarse crumbs the size of large peas. Drizzle the ice water over the mixture and toss with the fork until the dough is evenly moist and comes together in a mass (but not a ball).
2. Transfer the dough to a work surface. Shape into a 6″ disk, wrap in plastic wrap, and refrigerate until well-chilled, at least 1 hour.
3. Position a rack in the lower 1/3 of the oven, preheat it to 400o and line a half-sheet pan with parchment paper.
4. Dust a work surface and rolling pin with flour. Roll out the chilled dough into a round about 13″ in diameter. It will be about 1/8″ thick. Trim off raggedy edges so that it becomes an even 12″ round and put it on the prepared pan. Leaving 2″ border, sprinkle 1 tbs flour and 1 tbs granulated sugar over the prepared pastry.
5. In a large bowl, toss together the figs, brown sugar, 1 tbs of the flour, the lemon juice, the almond extract and the vanilla extract until all ingredients are well-mixed. Put the filling in the centre of the pastry, keeping it off of the border. Fold the border up and over the filling, forming little pleats around the edge and leaving the centre open. Brush the dough with the egg mixture, then sprinkle with 1 tbs granulated sugar.
6. Bake for 25 mins. Remove from the oven, scatter the raspberries on top, and then sprinkle with 1 tbs granulated sugar. Continue to bake until the crust is golden brown and the raspberries are beginning to soften, 8-12 mins. Transfer to a wire rack and let cool. This can be served either warm or at room temperature.

Makes 1 galette

Provençal Fougasse

I invited my parents (and my roommate’s parents) to dinner this weekend as my way of saying thank you for tolerating the obscenity of Manhattan rents. It struck me as a bit odd that we never had them over when we were living in our old apartment, but of course, this year’s abode is much more suitable for entertaining (translation: it is actually big enough to put real furniture in). Anyway, the menu for the evening is as follows: spinach and tomato timbales, roasted chicken with garlic, a sort of eggplant-and-peppers dish (aside: I love eggplant, and my mom makes this Sicilian dish called caponata, and I think it is probably one of the best things I have ever had.), fougasse, and, for dessert, a fig and raspberry galette, which I will post a recipe for tomorrow. This menu basically made my kitchen smell like the lyrics to Scarborough Fair (“Parsley, sage, rosemary and thyme…” + GARLIC!).

Fougasse is the Provençal variation of the ever-popular foccacia – a traditional Mediterranean flatbread. Fougasse is more likely than foccacia to have additions, such as cheese, olives or anchovies, although I have left these out. One fougasse feature that I really like is that it is common to slash it to resemble an ear of wheat.

Typically, I avoid making things with yeast in them because I am too impatient to wait for things to rise but, having tasted the final product, I’m glad that I did this time. Although, I should add that there was a panicked phone call to my mother: “Mom, I don’t think the yeast is foaming! Oh, wait, it looks like it’s making little mushroom clouds, fun! Oh, no, now it’s flat!” “I’m sure it’s fine.” “No, I don’t think so, it just looks like milky water, it’s not foamy at all, I think I need to do it over, because it says that the water should be between 105 and 115 and my thermometer says it’s only 102!” Result: it was fine.

fougasse

Provençal Fougasse
3 cloves of garlic, chopped
about 1 tbs chopped fresh rosemary (a bit more of the herbs certainly doesn’t hurt)
about 1 tbs chopped fresh oregano
about 1 tbs chopped fresh thyme
1/4 c extra-virgin olive oil
1 package (2 1/2 tsp) active dry yeast
1 3/4 c warm water (105oF to 115o or 40o to 46oC)
4 1/2 c all-purpose flour
1 tbs salt
semolina flour

1. In a small saucepan over medium heat, combine the garlic, rosemary, oregano, thyme and olive oil. Bring to a simmer and cook until the garlic is tender, about 1 minute. Remove from the heat and allow to cool to room temperature.
2. In a large bowl, dissolve the year in warm water and let stand until foamy, about 5 minutes. Add the oil mixture, flour and salt and stir with a wooden spoon until the dough comes together in a rough ball. Turn the dough out onto a clean, lightly oiled work surface and knead until the dough is elastic and no longer sticky, about 5-7 mins.
3. Shape the dough into a ball, transfer to a lightly oiled bowl, and cover it with a clean dishcloth. Let it rise in a warm spot until it doubles in bulk, about 1.5 to 2 hours.
4.. Punch down the dough and turn it out onto a clean work surface. Cut it in half using a sharp knife, and shape each piece into a loose ball, cover with a dry towl, and let rest for 5 mins.
5. Dust 2 half-sheet pans or baking sheets with semolina four. On a lightly floured surface, roll out each half of the dough into a rectangle about the same size as the prepared pans. Transfer each rectangle to the pans, spreading them with your hands if it shrinks. Make 6 slits (3 on each side) pointing towards the center of the dough. Gently pull on the dough to widen the slits into ovas.
6. Cover the dough loosely with a towel and let it rise again until it is doubled in bulk, 25-30 mins.
7. Position a rack in the lower 1/3 of the oven and preheat it to 425oF. Bake the breads until they are lightly browned and sound hollow when tapped on the bottom, 15-20 mins. Tranfser to wire racks and let cool completely in the pans.

Makes 2 large flatbreads

Cream Puffs!

I was really craving choux, the dough using to make cream puff pastry, this week, plus they are relatively quick (but not simple) to whip up. Simple was paramount this week – darned long algorithms homework! I prefer a custard filling in cream puffs, especially if you make it with vanilla bean. The flavour is really something special, if you can get your hands on it.

cream puffs

Cream Puffs
Choux
1/2 c whole milk
1/2 c water
6 tbs unsalted butter, cut into 1/2″ pieces
1/4 tsp salt
1 c unbleached all-purpose flour
4 large eggs

1. In a saucepan over medium-high heat, mix together the milk, water, butter and salt. Bring to a full boil. When the butter is melted, remove the pan from the heat, add all of the flour and stir with a wooden spoon until blended. This may require some powerful stirring. Return the pan to medium heat and continue to stir until the mixture forms a ball. Remove from the heat and let cool 3-4 mins, or to 140o on an instant-read thermometer.
2. Meanwhile, in a small bowl, whisk one of the eggs. Pour this into the cooled batter and beat with the spoon until it is incorporated. After the egg is added, the mixture will separate but it will come back to a smooth consistency after some beating. Repeat this process for the remaining 3 eggs. Let the paste cool for another 10 mins before piping it.
3. Preheat the oven to 425oF and line 2 half-sheet pans with parchment paper. Fit a pastry bag with a 5/16″ tip and fill with the paste. Pipe about 1 tbs of the paste onto a pan, forming a mound about 2″ in diameter Space the mounts at least 2″ apart so that they have room to puff.
4. Bake for 15 mins, then reduce heat to 375oF and continue to bake until the puffs turn golden brown, about 15 mins more.
5. Remove from the oven and immediately prick the side of each puff with a sharp knife. Reutrn to the oven, leave the door open and let the pastries dry for 10-15 mins. Move to a wire rack and allow to cool completely before filling.

Creme Patissiere
1 1/2 c whole milk
1 vanilla bean, halved lengthwise
4 large egg yolks
1/2 c sugar
2 tbs cornstarch
2 tbs unsalted butter

1. Scrape the seeds out of the vanilla bean with the tip of a knife. In a saucepan over medium heat, heat the milk with the vanilla bean pod and scraped-out seeds until just before it boils. Remove from the heat and take out the vanilla bean pod.
2. In a separate bowl, whisk together the egg yolks, cornstarch and sugar until smooth. Slowly whisk the hot milk into this mixture until well-blended, then return the entire mixture back to the sauce pan.
3. Cook over medium-low heat, whisking constantly to prevent curdling or uneven cooking, until the mixture comes to a boil and thickens, about 3 mins. Continue to whisk and cook for about another minute. Pour through a fine-mesh sieve unito a clean bowl and stir in the butter until it is melted and smooth.
4. Cover the bowl with plastic wrap to prevent a skin from forming and refrigerate until well chilled.
5. Fit a pasty bag with a small tip and fill the back with the chilled creme patissiere. Make a small incision in a puff and fill with the cream. Repeat until all puffs are complete.

Makes about 15 large puffs

French Apple Tart

It’s Rosh Hashanah, so of course, that calls for a Rosh Hashanah dinner party (which, for my friends and me, is very similar to our Passover dinner party, with even less religion because Rosh Hashanah does not have fun games like the afikoman hunt). We even reprised much of the menu, although this time, I was less involved in the cooking due to my immense amount of work this week. Given the fact that I have this lovely little baking blog going, I was only assigned dessert – I chose to make an apple tart [in a pie plate, though – less clean up] for several reasons:

1. It contains apples, which are symbolic of a sweet (a.k.a. good) new year.
2. I like tarts better than pies.
3. The top is pretty and fun to make.

apple tart

French Apple Tart
*Contains 3 parts: pastry, filling and topping

Tart Pastry
1 1/4 c all-purpose flour
1/2 c confectioners’ sugar
1/4 tsp salt
1/2 c cold unsalted butter, cut into 3/4″ pieces
2 large egg yolks
1 tbs heavy cream

1. In a large bowl, sift together the flour, confectioners’ sugar and salt. Scatter the butter pieces over the flour mixtur and toss with fingers or a fork to coat in the flour. Using a pastry blender or 2 knives, cut in the butter untill the mixture forms coarse crumbs about the size of peas.
2. In a small bowl, lightly beat the egg yolks with a fork, then stir in the cream until well-blended. Drizzle this over the flour mixture and stir with the fork until the dough is moist and comes together in a smooth, well-mixed mass.
3. On a work surface, shape the dough into a 6″ disk. Wrap in lastic and refrigerate until firm, at least 45 mins or up to overnight.
4. Remove the dough from the refrigerator. Lightly dust the work surface and a rolling pin with flour. Roll out the chilled dough into a round about 13″ in diameter and 3/16″ thick. Work quickly to prevent the dough from becoming too warm.
5. Line a 9 1/2″ tart pan with a removable bottom with the rolled out dough and freeze crust until firm, about 30 mins. Preheat the oven to 400oF. Prick the bottom of the crust with a fork all over and line it with foil and fill with dried beans, uncooked rice or pie weights.
6. Bake the crust until it dries out, about 15 mins. Remove the weights and foil. Lower the oven temperature to 350oF and continue to bake the crust for about 5 mins longer, until the edges are lightly browned. Remove and let cool completely.

Filling
5 apples (2 lbs), peeled, cored and cut into 1″ pieces
2 tbs sugar
2 tsp cinnamon
2 tsp fresh lemon juice, strained
1 tbs unsalted butter, melted

1. Position a rack in the middle of the oven and preheat to 375oF.
2. Line a half-sheet pan with parchment paper. In a large bowl, stir together the apple pieces, sugar, lemon juice, cinnamon, and melted butter until well mixed. Spread the mixture in the prepared pan.
3. Bake the apples until they are soft, about 20 mins, stirring once about halfway through. Remove from the oven and scrape the apples into a bowl. Using a spoon, mash the warm apples until there are only a few chumks left and they resemble chunky applesauce. Let cool to room temperature and spread in the prepared crust.

Topping
2 c (1/2 lb) peeled, cored, thinly sliced apples
1 tbs unsalted butter, melted
1 tbs sugar
1/4 c apricot preserves

1. Arrange the apple slices in 2 circular rows on the filled tart pan, slightly overlapping them to cover the filling completely. Drizzle with the melted butter and sprinkle with sugar.
2. Bake the tart until the apple slies are soft when pierced with the tip of a knife or a toothpick and the edges of the crust are browned, 45-50 mins. Transfer to a wire rack to cool.
3. In a small pan over medium heat, warm the apricot preserves until melted, about 3 mins. Strain through a medium-meshed sieve and, using a pastry brush, brush the apple slices with the preserves. Unmold the tart and serve at room temperature.

Makes one 9 1/2″ tart

Chocolate Coconut Cookies

After I made the other chocolate coconut cookies (Bounty Cookies), I realised that they were kind of a pain to make, and they did not keep very well. So when it came time to actually make something to ship, I decided to retool. Out of laziness, since one person wanted chocolate, while the other wanted coconut, I came up with a Chocolate Coconut Cookie so that I only had to worry about making one thing.

chocolate coconut cookies

Chocolate Cocout Cookies
24 oz. semi-sweet chocolate chips, divided
2 2/3 cups all-purpose flour
1 tsp. baking soda
1 tsp. salt
1 cup butter or margarine, softened
1 cup packed brown sugar
1/2 cup granulated sugar
1 tsp. vanilla extract
3 eggs
1 package coconut

1. Preheat oven to 375o.
2. Melt 2 cups morsels in small, heavy saucepan over lowest possible heat. When morsels begin to melt, remove from heat; stir. return to heat for a few seconds at a time, stirring until smooth. Combine flour, baking soda and salt in medium bowl.
3. Beat butter, brown sugar, granulated sugar and vanilla in a large mixer bowl. Add eggs one at a time, beating well after each addition. Beat in melted chocolated. Gradually beat in flour mixture. Stir in remaining chocolate chips and coconut. Drop by rounded tablespoon onto ungreased baking sheets.
4. Bake for 9 minutes or until cookies are puffed. Cool for 5 minutes on cookie sheet, then remove to a wire rack to cool completely.

Chocolate Malt Sandwich Cookies

In Bloomfield, NJ, not far from where I grew up, there is an old-fashioned ice cream parlour called Holsten’s. They have such lovely things on the menu as the “cherry smash”, and grilled cheese with tomato in addition to a wide range of homemade ice creams and candy. I always loved the “Duster Sundae”, which is ice cream, chocolate syrup, malt powder, whipped cream and a cherry. This was probably the first place that I ever tasted malt powder (aside from Malteasers) – and then one day, I discovered that it was possible to purchase malt powder in a regular grocery store. Imagine that!

So, now that you know all about my love affair with malt powder…a word on the filling of these cookies. It is amazing. Seriously. It has the consistency of chocolate frosting from a can but it tastes just SO MUCH BETTER.

chocolate malt sandwich

Chocolate Malt Sandwich Cookies
2 c plus 2 tbs all-purpose flour
1/2 c unsweetened cocoa powder
1/4 c plain malted milk powder
1 tsp baking soda
1/2 tsp salt
1 c (2 sticks) unsalted butter, room temperature
1 3/4 c granulated sugar
1 egg
2 tsp pure vanilla extract
1/4 cup creme fraiche (I just diluted some sour cream with buttermilk)
3 tbs hot water

For the filling
10 oz semisweet chocolate, coarsely chopped
4 tbs (1/2 stick) unsalted butter, cut into small pieces
1 c plain malted milk powder
3 oz cream cheese, room temperature
1/4 c plus 2 tbs heavy cream
1 tsp pure vanilla extract

1. Preheat oven to 350 degrees. Sift together flour, cocoa powder, malted milk powder, baking soda, and salt. Beat butter and sugar on medium-high speed until light and fluffy. Mix in egg, creme fraiche, and hot water. Reduce speed to low and beat in flour mixture.
2. Place tablespoon-size balls of dough 3 1/2 inches apart on parchment paper-lined baking sheets. Bake until flat and just firm, about 12 minutes. Let cool on parchment on wire racks.
3. Meanwhile melt chocolate and butter in a heatproof bowl set over a pan of simming water, stirring. Remove and let cool slightly. Beat malted milk powder and cream cheese on medium speed until smooth. Gradually beat in heavy cream, chocolate mixture, and vanilla until well mixed.
4. To assemble the cookies, spread a heaping tablespoon filling on the bottom of one cookie. Sandwich with another cookie. Repeat. Cookies are best stored in a refrigerator.

Makes about 1 1/2 dozen cookies